Rename a project
There are 2 ways to rename a project:
- Project > “Settings”

- Menu bar on the left > Project name > Click on the 3 small dots

Duplicate a project
Menu bar on the left > Project name > Click on the 3 small dots to the right of the name. A new menu opens: click on “Duplicate”.

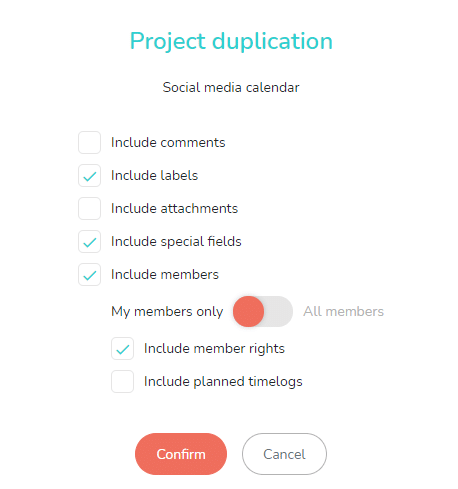
A pop-up window opens, allowing you to choose what to include, among the following:
- The comments.
- The labels.
- The attachments.
- The special fields.
- The members.
For members, you can:
- Include your members only or all members of the duplicate project.
- Take over their rights.
- Take over their planned time.

Then click on “Confirm” to duplicate your project. The copy will display the same name as the original project, followed by a number. You will then be able to change its name. The features of the duplicate project remains the same as other projects and the two projects are now completely independent.
A new project is automatically created with the same name as the original project followed by a number. You can then rename the copy if you wish.
This feature is useful for creating template projects that you can use for reference.
Template projects can then be archived or classified in a dedicated folder.
Categorize a project in a folder
Menu bar on the left > Project name > Click on the 3 small dots 

See our article dedicated to project folders for more details on this subject.
