Beesbusy allows you to synchronize your tasks in Gitlab projects.
This is done in two steps:
- The connection of your Beesbusy account with your Gitlab account
- The setting of the Beesbusy project concerned by the synchronization of the tasks towards Gitlab
The connection of your Beesbusy account with your Gitlab account
User drop down menu > Connectors: You have access to all Beesbusy connectors.
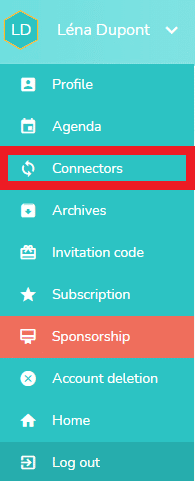
Once in the Beesbusy connectors, go to the section 
You have two possibilities to connect with Gitlab:
- Use Gitlab SaaS
- Use Gitlab in self-hosted
The choice between the two possibilities is made with the slider:

Connect to Gitlab SaaS
Position the cursor on Gitlab SaaS and click on.
You will be redirected to your Gitlab account, and an authorization message will appear:
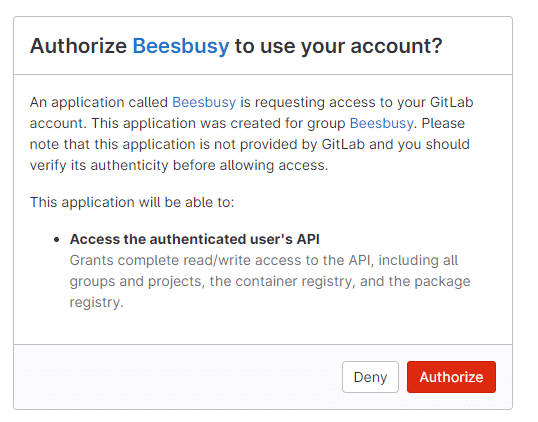
To accept the connection between your two accounts, click on ” Authorize “.
After authorising the connection, you will be connected and redirected to the Beesbusy connectors page.
The boxed message below will indicate that the operation was successful:
Connecting to Gitlab in self-hosted
To connect to Gitlab in hosted mode, you must enter:
- The URL of the self-hosted application you are using.
- The ID of the self-hosted application you are using.
- The secret code of the self-hosted application.
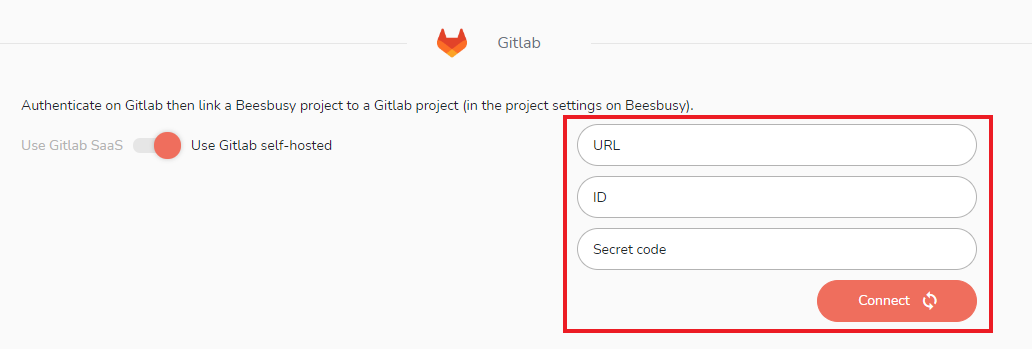
To find this information, go to your Gitlab host.
Find the URL of the self-hosted application
This URL is specific to each user and each host.
To do this, go to your hosted Gitlab and copy its URL.
Here is an example of a self-hosted Gitlab URL:

Then paste the URL into the Beesbusy interface of the Gitlab connector.
Generate the ID and secret code of the self-hosted application
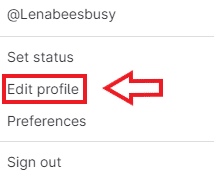
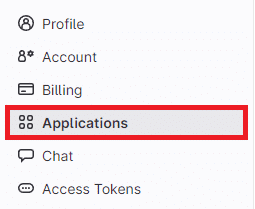
Go to your Gitlab host, go to your menu on the top right of the page, then to “Edit Profile” and “Applications”.
In Applications, you must enter the name of the application you want to link with Gitlab. In this case it is Beesbusy.
Add the URL of your Gitlab host in the “Redirect URI” box as shown below.
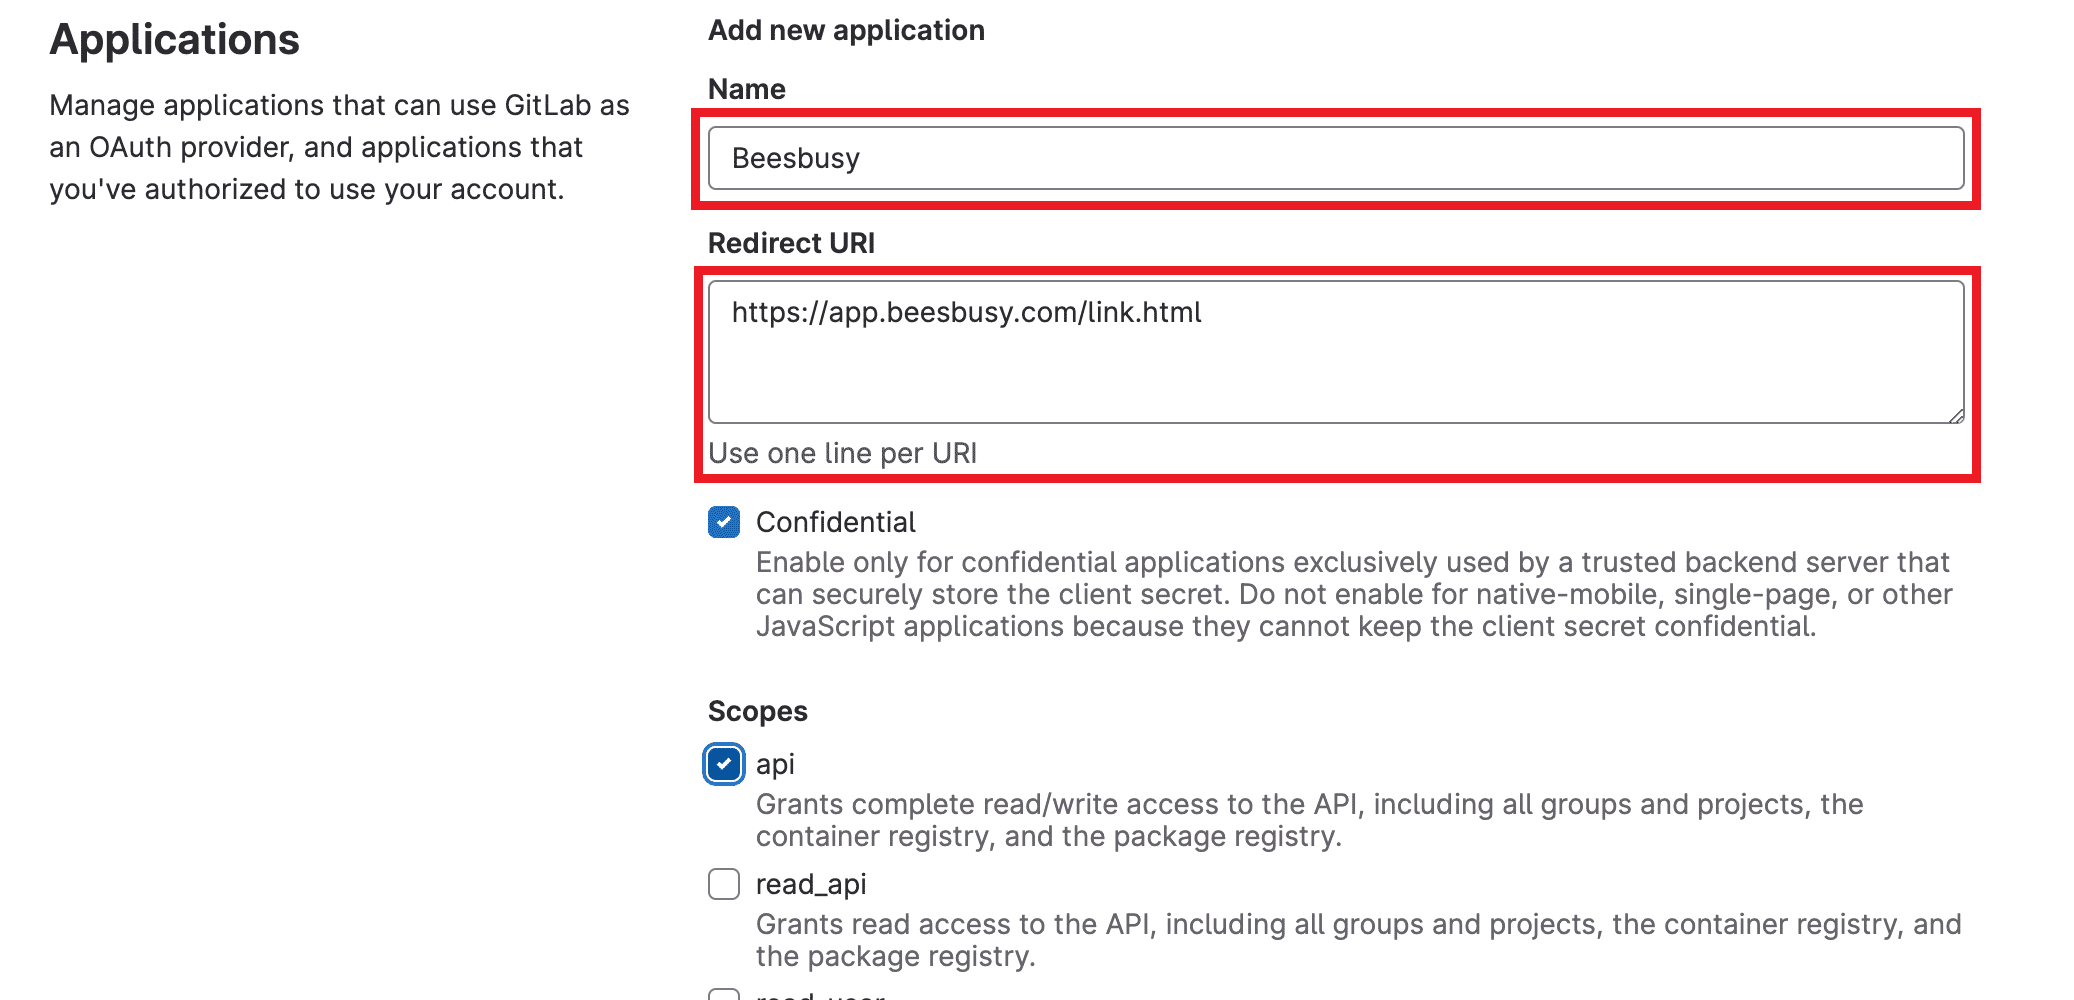
Then on the same page, check the “API” box.
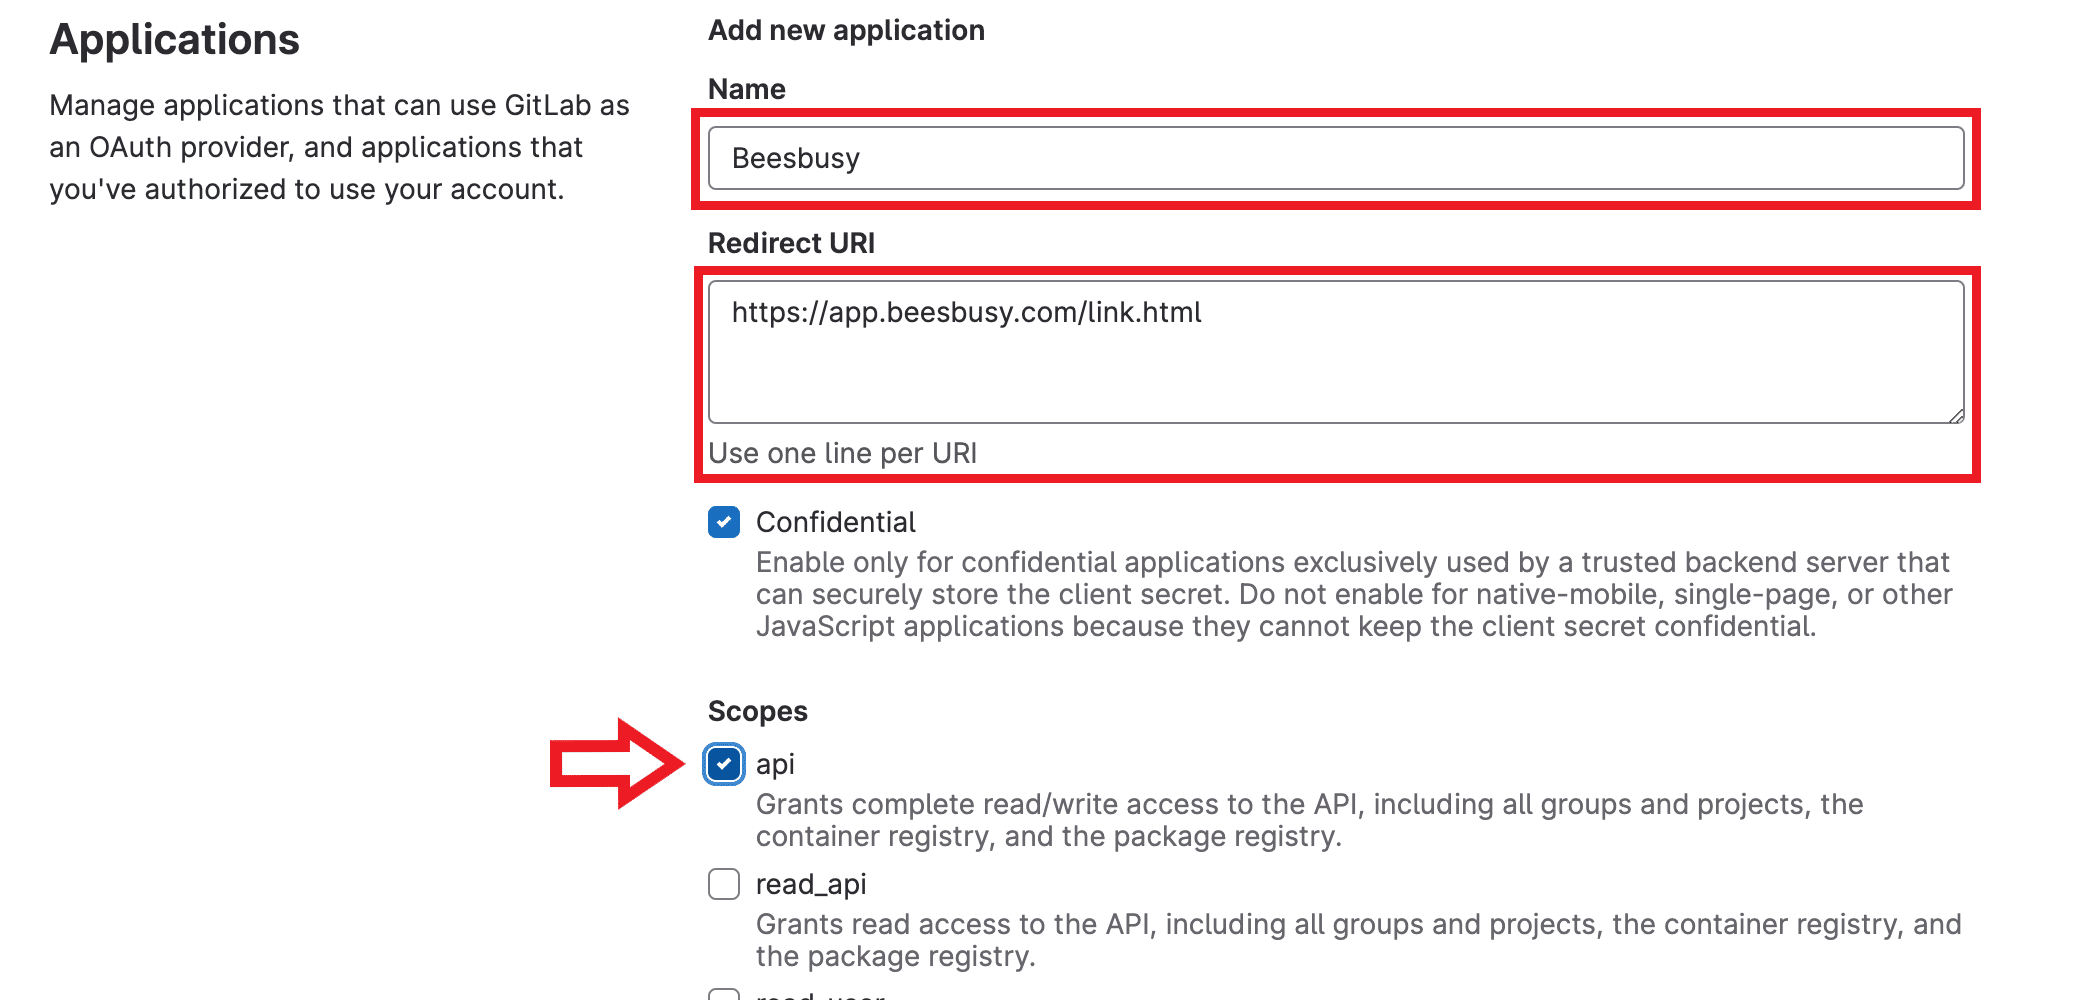
To generate the ID and secret code click on 
A new page will appear, this will contain the ID and secret code, it is possible to copy them by clicking on the icon next to it.
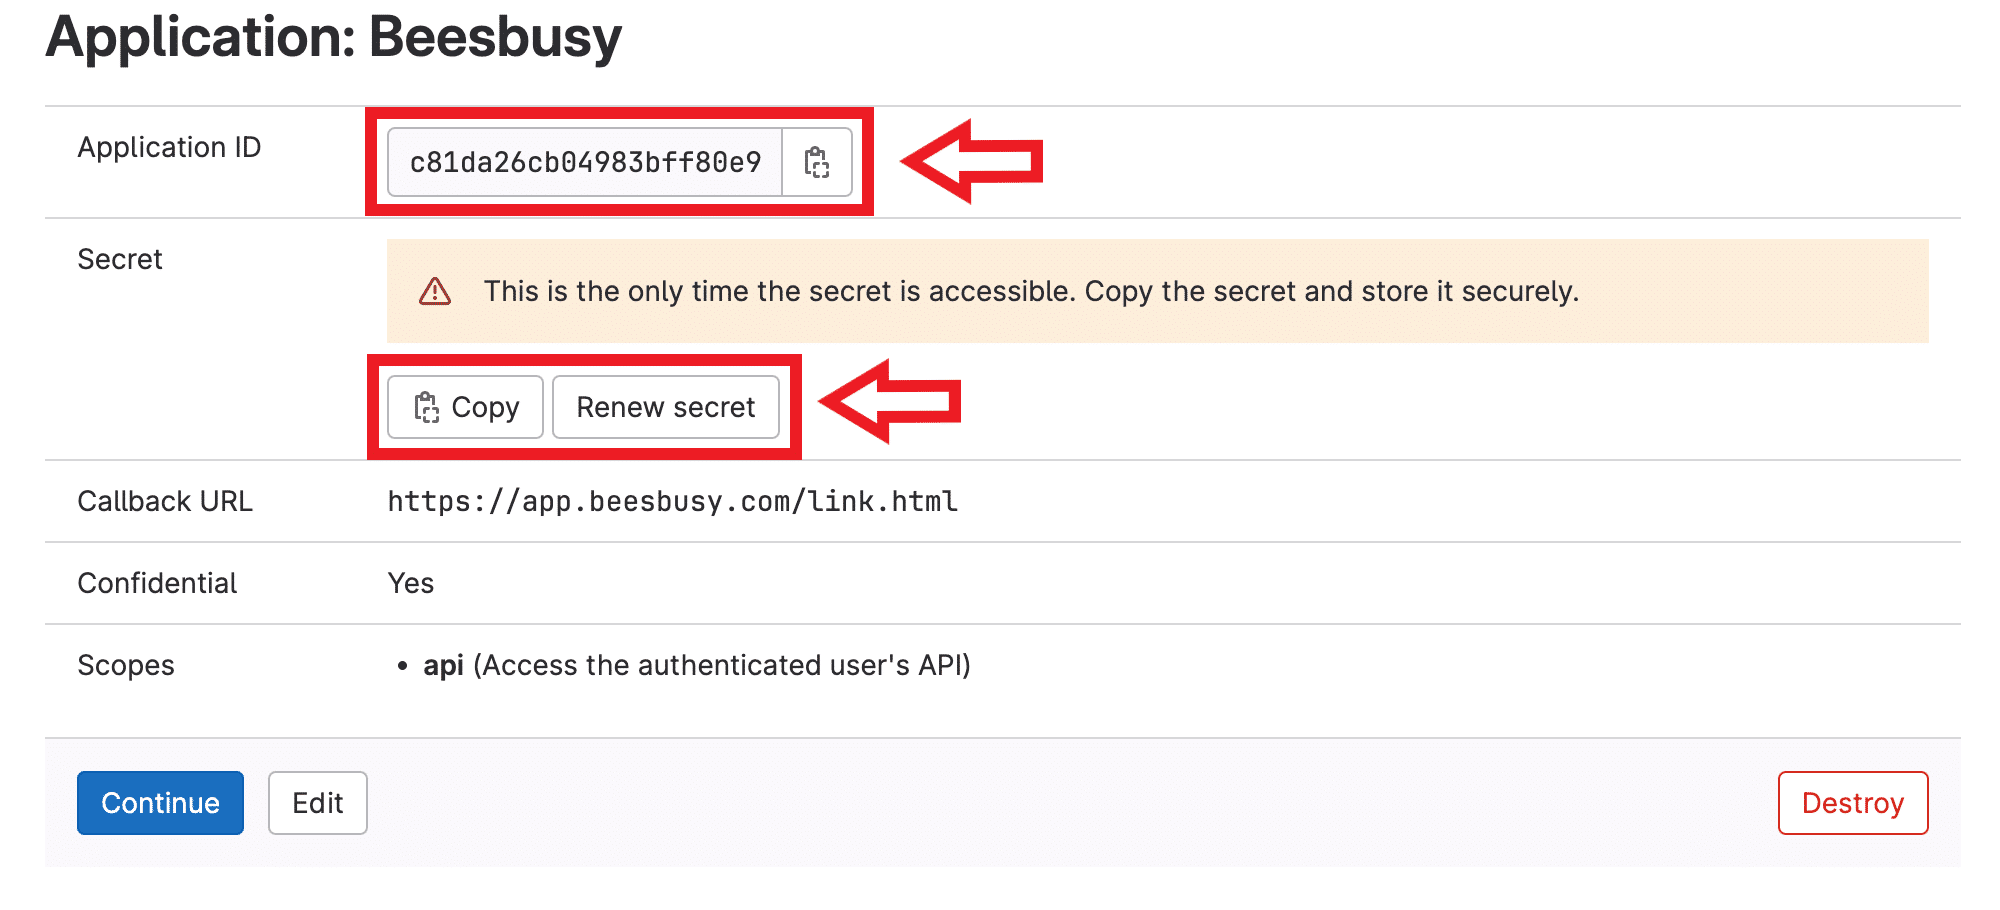
After completing the ID and secret code on the Beesbusy interface of the Gitlab connector, click on “continue” in blue on Gitlab and 
If the operation was successful, you will be redirected to the Beesbusy connectors page, with a message confirming the connection between your two accounts.

Beesbusy project settings for synchronizing tasks to Gitlab
The Gitlab connector option in a Beesbusy project
To link a Beesbusy project to a Gitlab project, go to the settings of a project of your choice.
Scroll down to the bottom of the settings and go to Gitlab Connector Options.
Choose one of your Gitlab projects that you want to integrate into Beesbusy.

Once you have chosen your Gitlab project, click on the Synchronize button.
You can now export your Beesbusy tasks to the chosen Gitlab project.
Note that the synchronization works from Beesbusy to Gitlab but not from Gitlab to Beesbusy.
If you check the “Automatically synchronize new tasks” box, all new tasks created will be automatically sent to the chosen Gitlab project.
If you don’t check it, you can then choose the tasks to synchronize with Gitlab as shown below.
Synchronising a task
Go to a task in a project that is connected to Gitlab.
In the task’s What tab, click on “Gitlab” in the right-hand menu, then click on the “Create an issue” button:
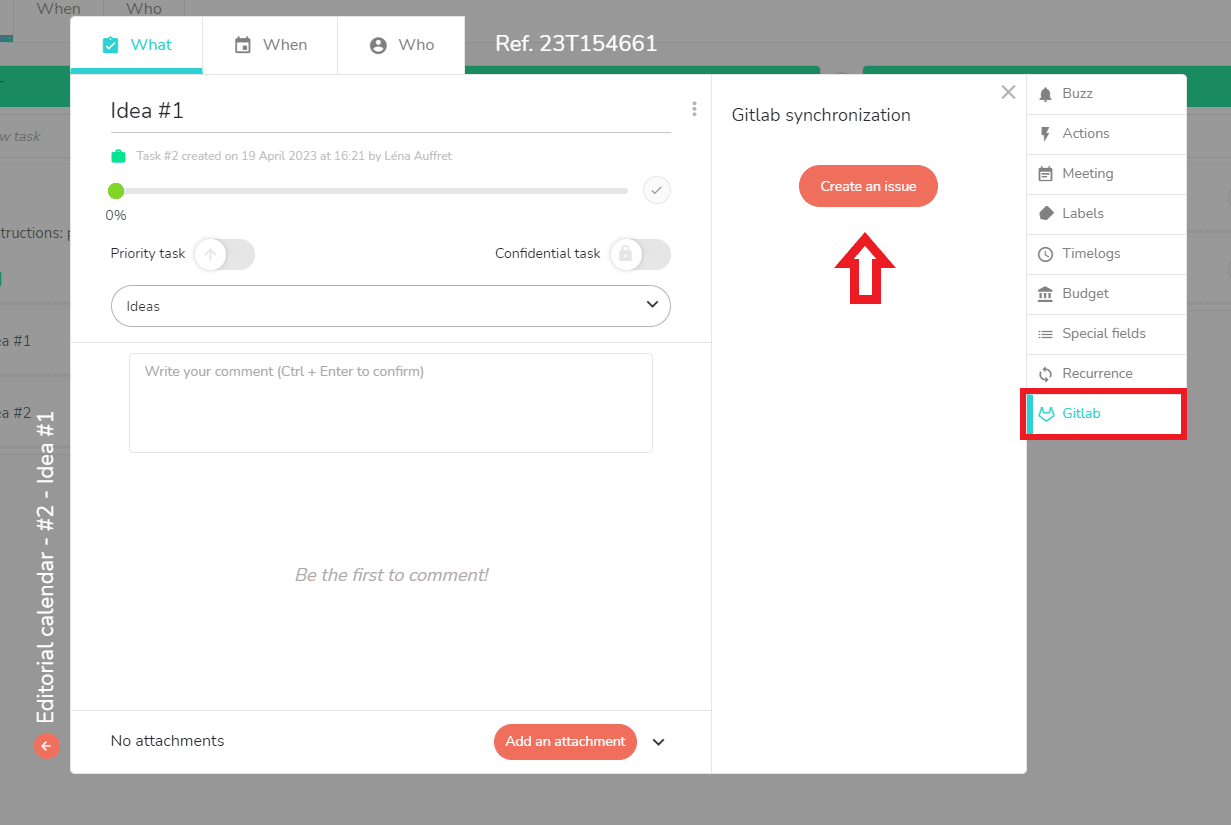
A ticket is then created in the Gitlab project chosen in the Beesbusy project settings.
This ticket has the same name as the Beesbusy task.
The comments of the Beesbusy task are also taken into account and synchronized in the Gitlab ticket.
Disconnecting from Gitlab
Disconnecting from your project
To cancel the synchronization between a Gitlab project and a Beesbusy project, you just have to go in the project settings, access the Gitlab connectors options and click on:

Disconnect from Gitlab

To disconnect your Beesbusy account from your Gitlab account and stop all synchronization, nothing could be easier: you just must click on the ” Disconnect ” button in the connectors page of your Beesbusy account:
