What are actions?
Actions allow you to add another level of details to your tasks. You can add multiple actions to a task, they are aimed to be a list of things to carry out for your task, a checklist of sorts.
Actions can be found in different places of the task detail panel, with different usage.
Summary of actions panel
To view or create actions, open a task. On the right, click on “Actions”. A side panel opens: you will find all the actions of the task there.
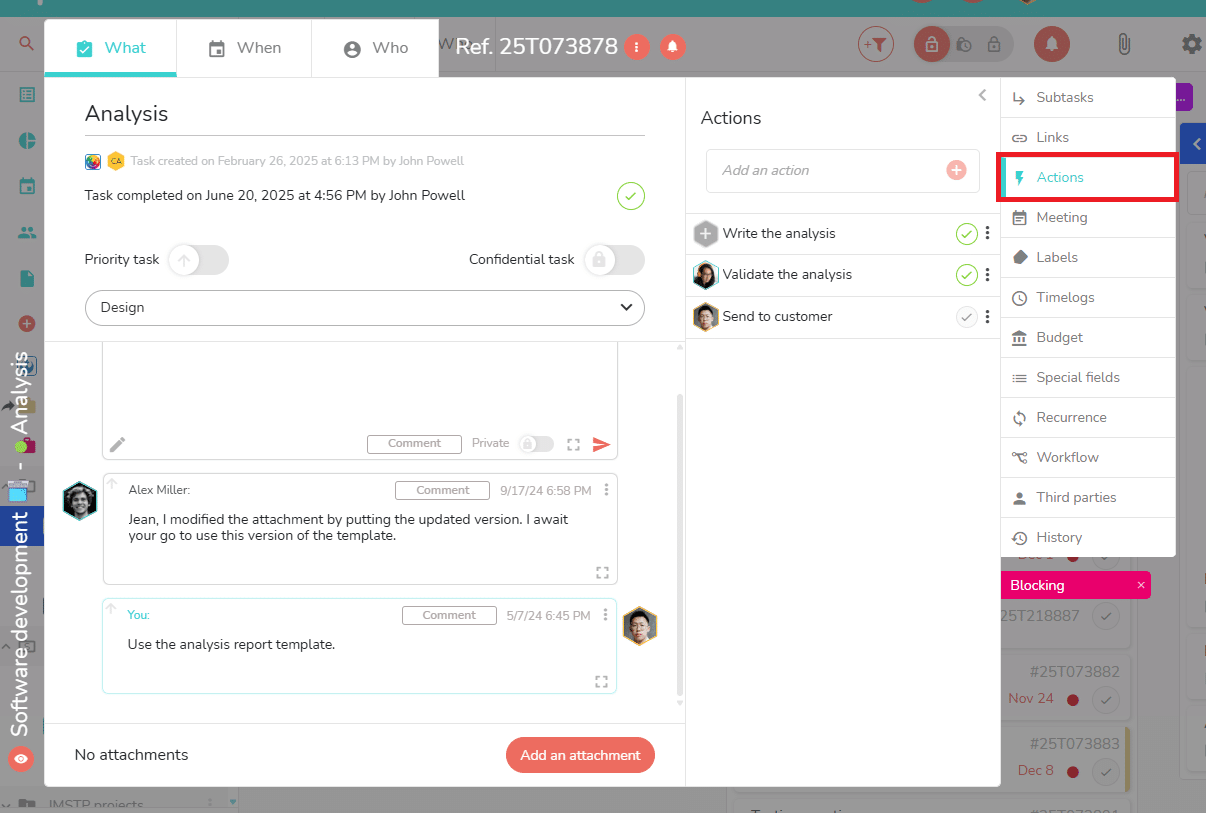
- Add an action to the task: enter the name of your action in “Add an action”, press “+” or the “Enter” key to validate.
- Assign a member to the action: click on the hexagon-shaped icon to the left of the action and select the member you want to assign to this action.

- Mark an action as completed: click on the validation check mark
 . The icon turns green.
 - Rename, delete an action or unassign a member: click on the 3 small dots to the right of the action name, then click on “Rename”, “Delete” or “Unassign member”.
- Click on the assigned person’s avatar on the action to replace it.
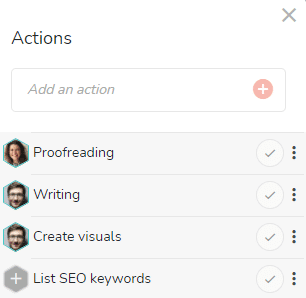
When you create multiple actions, they are automatically ordered from oldest (top) to newest (bottom).
However, you can change this order by dragging and dropping actions.
Note : in this panel, you find all the actions of the task, regardless of their status (completed/not completed, assigned/unassigned).
Turn comments into actions
In the comments entry box (What tab of the task), list your actions (one line = one action), then validate the comment. Then click on the 3 dots to the right of the comment and select « Transform into an action ».
This allows you to quickly add a “checklist” of things to do, for instance during a meeting.
To know more about comments:
https://www.beesbusy.com/resources/features/tasks/comments-task/
Create actions directly for a specific member
In the Who tab of the task, next to each member assigned to the task, click the actions button to unfold or hide the panel.![]()
For each member assigned to the task, you can add, edit, or delete actions, and mark actions as completed.
In the Who tab, you thus have a distribution of actions by member. You can only view actions assigned to members.

Note : setting an action as completed won’t have any impact on the progress of the task and won’t set the task as completed.