Special fields allow you to create your own frame of reference in Beesbusy to qualify some of the items.
The elements that can have a special field are projects, tasks, times, and members.
In order to make queries on special fields possible (search tool, filters), the special fields you create are a common frame of reference applying to the scope of your subscription.
They are therefore managed by the account in charge of licence administration.
Managing special fields
Create a special field
Go to the drop-down menu at the top right > Profile > Subscription Parameters > Special Fields > click on the ” 
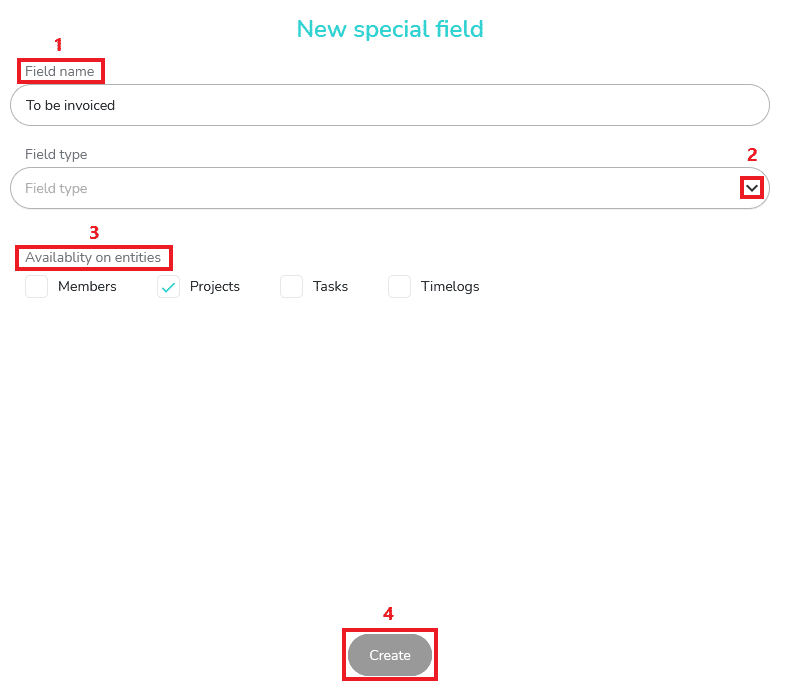
To create a special field, 1/ name the field, 2/ assign a type to it, 3/ specify which item(s) it applies to, then click on ” Create “:
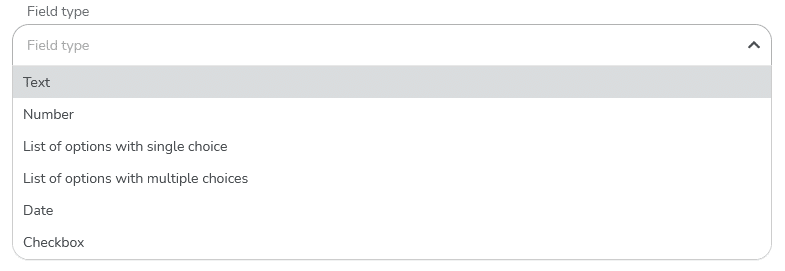
You have several possibilities for the field types:
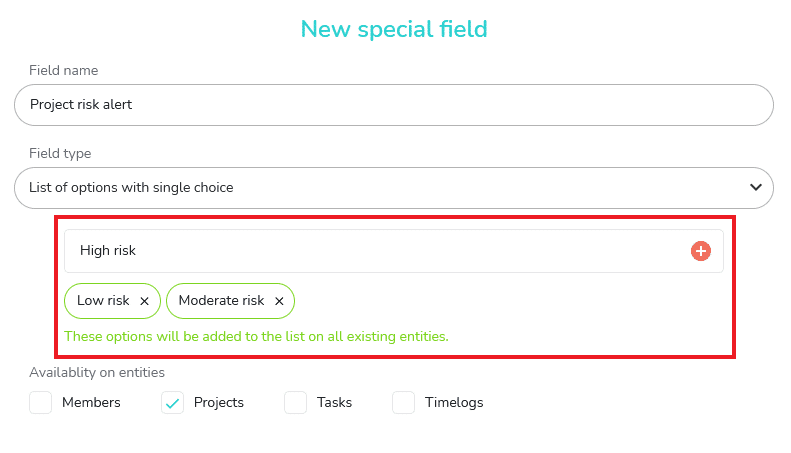
For single or multiple-choice option lists, you are asked to define which options you will offer to your subscription members:
Deleting special fields
It is possible to delete special fields from the repository created by the administrator from the subscription settings of his/her profile.
Simply click on the field menu and choose “Archive”:

A confirmation is requested to archive your special field. When it is archived, it is possible to retrieve it in your menu > Archives > Special fields.
Indeed, if you want to create a field identical to a field already archived, an error message appears: “A special field with this label already exists”.

You must then go to the Archives to unarchive it or delete it to create a new one with the same name.
Using special fields
Adding a special field
If you have Administrator rights on a project, you can manage the special fields to be used in the ‘Special fields’ section of the project settings.
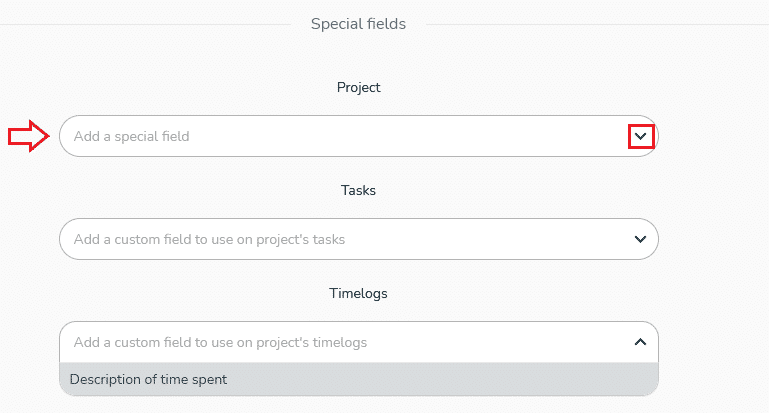
Go to the project where you want to add a field, access the project settings, scroll down to the “Special fields” section. Click on the ‘Add special field’ drop down menu in the category of your choice: Project, Tasks or Timelogs. A drop-down list will appear with the special fields that were previously created by the administrator account.
The addition of a special field on a member can only be done by the member himself.
It is done in the Profile in the “Special fields” section:

Displaying special fields
The display of special fields varies according to the items:
- Members: Special fields for members can be accessed directly from your profile > Information > Special fields:

- Projects: The project fields are accessible in the project settings.

- Tasks: The special fields on tasks are accessible in the sidebar of the project tasks. Click on a task and click on the “Special fields” icon.

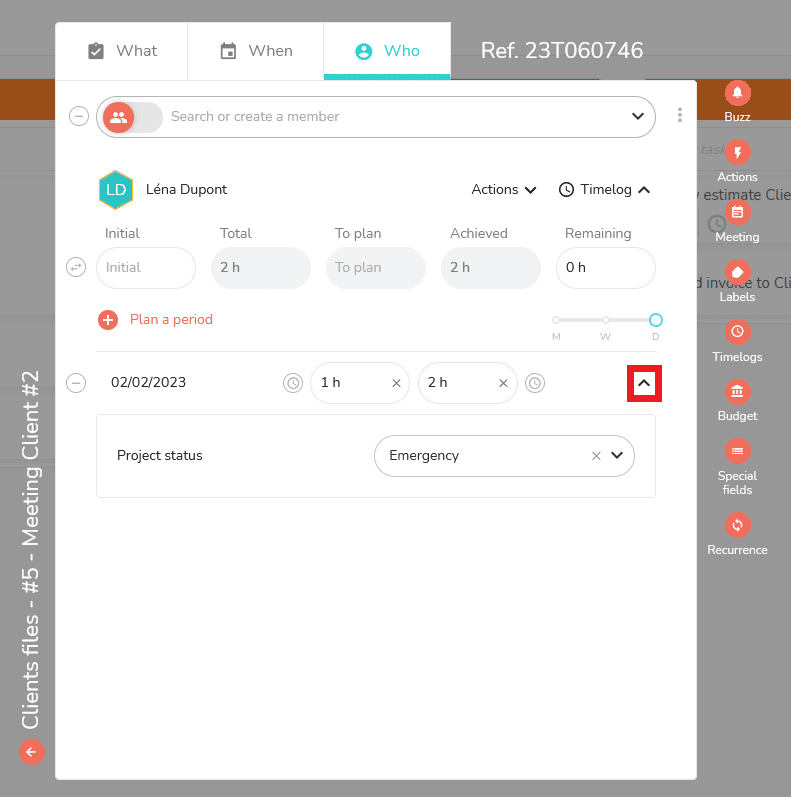
- Time: The time fields are accessible on the project tasks in the “Who” tab, provided you have entered time over a specific period:
Good to know: When sharing a project, only members who are on the same subscription as you can see your special fields.
Removing a special field
After adding a special field to a project, task or time, removing a special field is done in this way: access the project settings, go to the special fields section, place your cursor on the field you wish to remove, this icon will appear next to the field name, click on it and a confirmation of removal is requested.
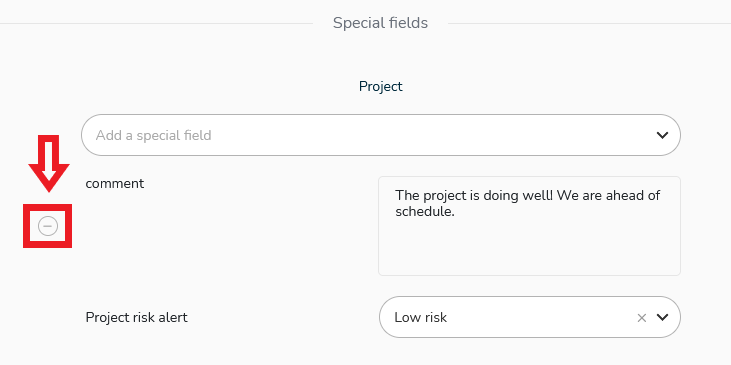
You can only remove a special field if you are creator or administrator of the project concerned.
To go further:
- You can enhance the value of special fields in the Excel exports of projects
- You can use the search tool by querying special fields
- You can filter on fields in project views or in multi-projects