Add timelog entries on a task
Click on a task to display the details panel, then go to the Who tab.
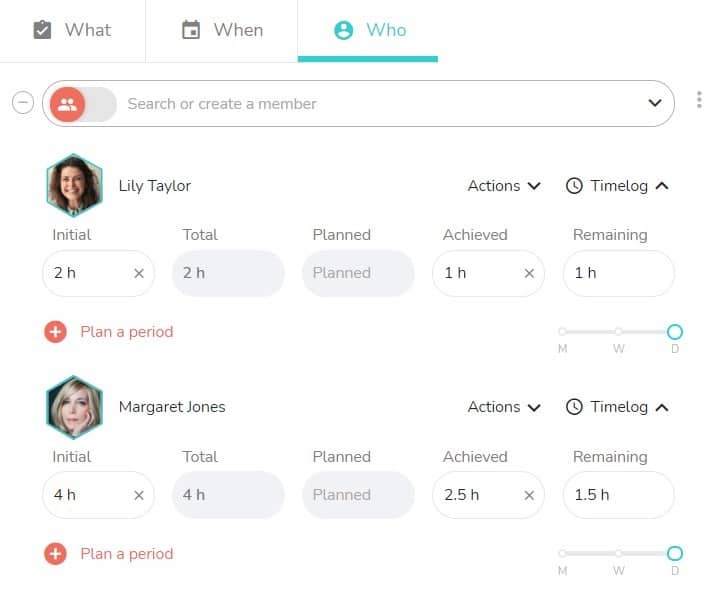
For each person assigned to the task, you can add different times. Click on “Timelog” next to the member’s name to expand the time panel.
You can indicate different types of time:
- Initial: estimated time needed to complete the task
- Achieved: time spent on completion
- Remaining: time needed to complete the task

Once timelog entries are added, they manage the progress percentage of the task (What tab).
Plan time by period
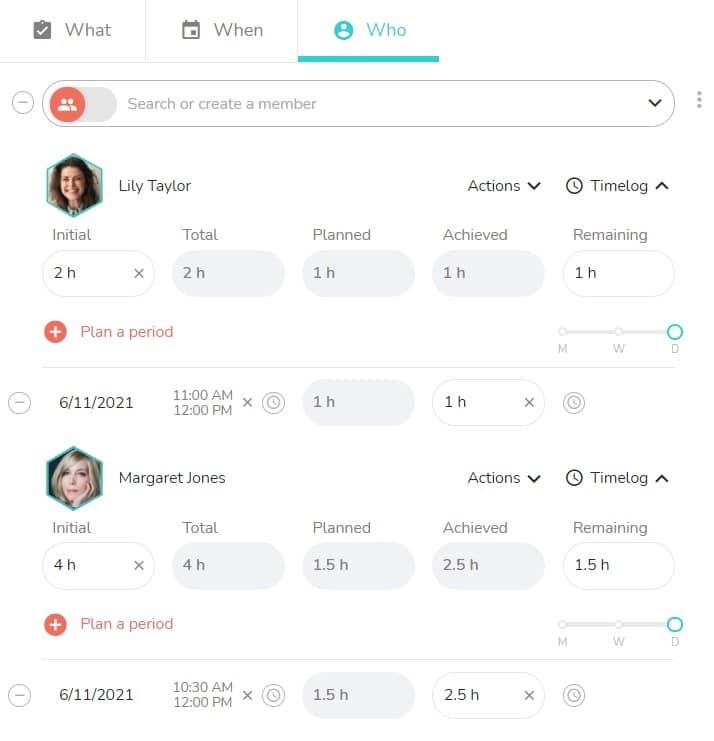
After entering timelog entries, you can plan them for specific periods.
Click on “Plan a period”, select the type (month, week, day) and the period. Once the period has been added, you can enter the corresponding time.
If you schedule for the day, you can specify the time range of the day on which the task should be performed.
In the entry calendar, you will see the member’s occupancy rate appear and therefore any unavailability.
The “Planned” field is automatically updated to include the total of planned time per period.

If the planned workload exceeds the duration of the task initially scheduled in the When tab, the duration of the task is then adjusted according to your input.
Overview of timelog entries on a task
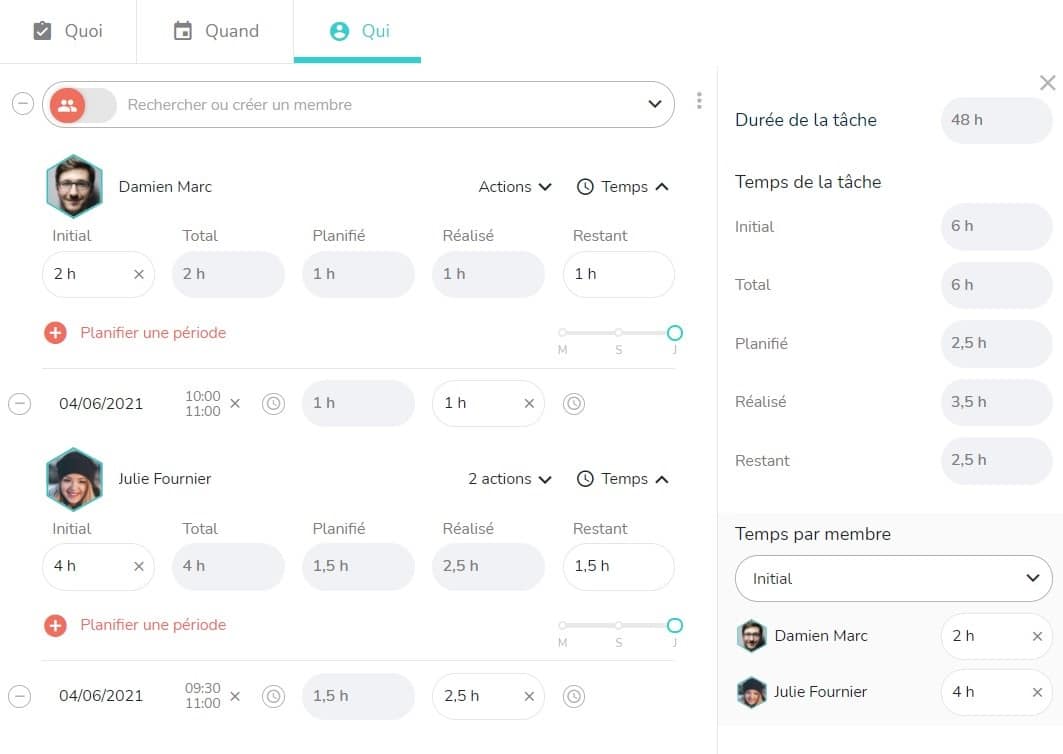
To access the timelog entries entered for all the users assigned to the task, click on the “Time” icon to the right of the task details window. The time panel then opens on the right.
This section allows you to view the total of the different types of timelog entries. Select a time from the drop-down menu to display the details by member.
